
Transforming a bare garage slab or a basement concrete floor into a high-performance training sanctuary is one of the most rewarding upgrades a fitness enthusiast can undertake. However, the thought of working with sticky polyurethane adhesives, permanent chemical bonds, and messy cleanup often deters DIYers. Enter interlocking rubber floor tiles. Utilizing a “loose-lay” interlocking system, these heavy-duty tiles provide the exact impact absorption and durability of commercial facilities without the permanence or hassle of glue. With the right preparation and a few basic tools, you can achieve a professional-grade gym floor in an afternoon.
1. Subfloor Preparation and Moisture Management
A flawless installation begins long before you snap your first puzzle tab together. The lifespan and stability of your loose-lay rubber floor depend entirely on the condition of your subfloor.
- Cleaning and Debris Removal: Sweep and vacuum the concrete, wood, or tile subfloor thoroughly. Any stray pebbles, grit, or dried construction debris left underneath heavy rubber tiles will telegraph through the surface over time, creating awkward bumps or potential tripping hazards.
- Leveling Dips and Checking Moisture: Inspect your subfloor for severe low spots or cracks. While interlocking rubber has enough structural weight to lie flat, major dips should be patched with a self-leveling compound. If you are installing in a garage or subterranean basement, check for moisture issues. Concrete is porous and can wick moisture upward; laying down a thin vapor barrier sheeting before placing your rubber tiles prevents trapped humidity and mold growth.
2. Tools, Materials, and Layout Planning
Before opening a single box of tiles, gather your equipment and plan your spatial grid. Having the right tools on hand prevents frustrating mid-installation interruptions.
- The Essential Toolkit: Prepare a heavy-duty utility knife with a supply of fresh trapezoid or hook blades, a rigid 4-foot metal straight edge, a chalk line, a heavy-duty tape measure, a rubber mallet, and standard safety gear (cut-resistant gloves and safety glasses).
- Calculating and Layout Strategy: Measure the length and width of your room to calculate total square footage and order roughly 5% extra to account for edge trimming. Rather than starting directly against a potentially crooked wall, find the center of the room and snap intersecting chalk lines. Starting your first tiles at the center and working outward ensures that any edge cuts required at the walls are symmetrical and balanced on opposite sides of the room.
3. The Step-by-Step Loose-Lay Interlocking Process
With your center point established, you are ready to begin assembling the floor. Because these tiles rely on their own combined weight and interlocking puzzle tabs, precision during this phase is critical.
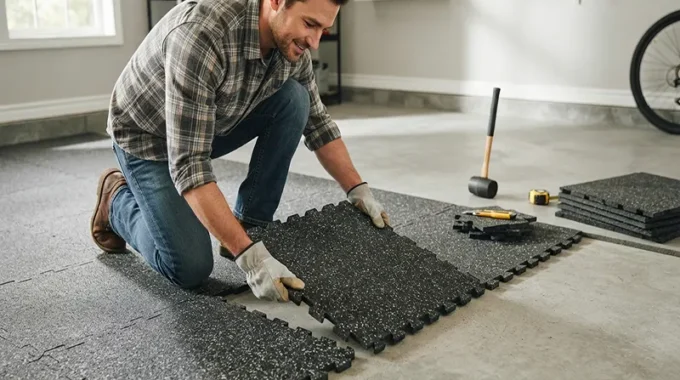
- Interlocking the First Tiles: Lay down your first four center tiles where your chalk lines intersect, aligning the puzzle tabs carefully. Use a rubber mallet to gently tap the tabs into place. Never strike the rubber edges brutally; firm, controlled taps will seat the interlocking fingers flush without distorting the material.
- Expanding Outward and Maintaining Square: Work outward in a pyramid or quadrant pattern, clicking tiles together row by row. Periodically check your alignment against your chalk lines to ensure your rows are staying straight and square. The interlocking tabs will hold the field tightly together, creating a unified, floating membrane that requires zero glue to stay put.
4. Precision Cutting and Wall-Edge Fitting
Eventually, your expanding floor will reach the perimeter walls, pillars, or corners, requiring custom cuts to fill the remaining gaps.
- Leaving an Expansion Gap: Rubber expands and contracts slightly with temperature fluctuations. Always leave a tiny 1/4-inch expansion gap between the edge of the rubber tile and the drywall or baseboard.
- The Multi-Pass Scoring Technique: Measure the exact distance from the last locked tile to the wall. Transfer that measurement onto your un-cut tile using a chalk line. Place your metal straight edge firmly along your cut line. Instead of trying to slice through thick vulcanized rubber in a single stroke—which dulls blades instantly and creates jagged edges—score the surface firmly with your utility knife 4 to 6 times until you cut halfway through. Then, snap the tile upward along the score line and slice cleanly through the backing.
Maintenance Best Practices
Installing interlocking rubber floor tiles without adhesive delivers the ultimate combination of commercial performance and DIY flexibility. Your subfloor remains pristine, installation time is cut in half, and if you ever move or reconfigure your gym, the entire floor can be disassembled just as easily as it was put together.
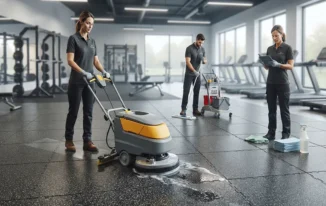
To keep your floor looking pristine for years of heavy lifting, simply sweep or vacuum away dirt regularly, and mop occasionally using a damp microfiber pad and a pH-neutral, water-based cleaner. Avoid harsh petroleum-based solvents, and your floating rubber floor will stand strong against years of intense training.