
In any serious training environment, whether it is a bustling commercial fitness center or a dedicated garage setup, flooring is far more than an aesthetic choice—it is the literal and structural foundation of every lift, jump, and sprint. Too many fitness facility owners and home gym enthusiasts make the mistake of cutting corners with cheap, high-density foam mats or thin rubber rolls, only to watch them tear, curl, or compress under heavy loads. Professional-grade, heavy-duty rubber floor tiles represent the gold standard in the fitness industry, offering unmatched impact absorption, concrete subfloor protection, noise reduction, and long-term durability.
1. Why Heavy-Duty Rubber is the Gold Standard for Gyms
The engineering behind high-end gym flooring is rooted in material science. Premium heavy-duty rubber tiles are typically manufactured from recycled vulcanized rubber granules (often sourced from high-grade truck tires) bound together under intense heat and pressure. This vulcanization process cross-links rubber polymers, creating a dense, resilient material that withstands extreme weight without permanently deforming.
- Impact Absorption and Force Reduction: When dropping a 300-pound barbell or heavy dumbbells, kinetic energy must go somewhere. Without proper flooring, that shockwave transfers directly into your concrete subfloor, causing hairline fractures in the concrete and sending damaging vibrations back up into your joints. Heavy-duty rubber acts as a shock absorber, dispersing impact energy safely across the surface.
- Vibration Dampening and Sound Control: Dropping heavy loads creates a booming acoustic echo that can travel through entire buildings. High-density rubber dampens structural vibrations and muffles impact noise, making it essential for multi-level commercial facilities, apartment complexes, and home gyms adjacent to living spaces.
2. Commercial vs. Home Gyms: Choosing the Right Thickness and Format
Not all workouts place the same demands on flooring, which means your choice of thickness and tile format must align with your specific environment.
- Determining the Right Thickness:
- 8mm: Ideal for general fitness areas, cardio equipment zones, and light-to-moderate dumbbell racks.
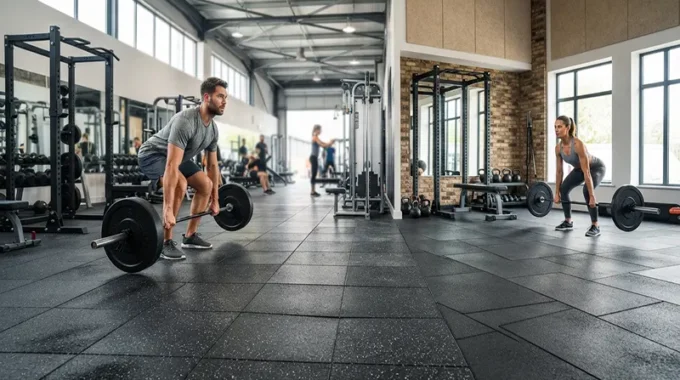
- 3/8-inch (approx. 10mm) to 1/2-inch: The sweet spot for versatile home gyms and functional training spaces, capable of handling routine deadlifts and moderate Olympic lifting.
- 3/4-inch: The commercial standard for heavy drop zones, powerlifting platforms, and cross-training boxes where heavy bumper plates are dropped repeatedly from overhead.
- Format Selection (Interlocking vs. Square Cut):
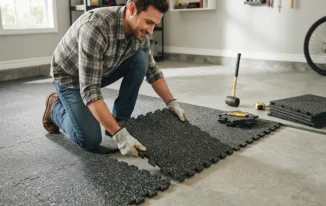
- Interlocking Tiles: Featuring puzzle-edge cuts, these are the preferred choice for DIY home and garage gyms. They lock together securely without the need for messy adhesives, allowing you to easily disassemble or reconfigure them if you move.
- Square-Cut (Straight-Edge) Tiles and Rolls: Best suited for commercial installations. Square tiles fit tightly edge-to-edge (often installed with a polyurethane adhesive), providing a seamless, monolithic look that prevents dirt and moisture from seeping into seams.
3. Key Performance Factors: Durability, Traction, and Maintenance
When investing in gym flooring, performance goes beyond initial looks. You must evaluate how the surface behaves under intense daily use.
- Surface Traction and Slip Resistance: Sweaty footwear, spilled chalk, and high-velocity movements require a high-friction coefficient. Quality rubber tiles maintain a textured, anti-slip surface even when moisture is present, preventing dangerous slips during explosive plyometrics, agility drills, or heavy squats.
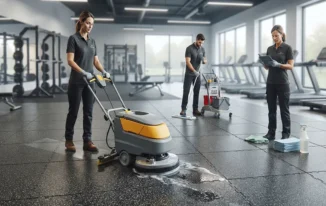
- Hygiene, Moisture Resistance, and Odor Management: Unlike porous foam, vulcanized rubber is non-porous and moisture-resistant, meaning it will not absorb sweat, bacteria, or liquid spills. While brand-new vulcanized rubber can sometimes emit a distinct rubber scent initially, high-grade tiles off-gas quickly in a well-ventilated space and can be easily sanitized with a pH-neutral cleaner and a micro-fiber mop.
4. Installation Best Practices and Subfloor Preparation
A flawless floor installation begins long before the first tile is laid down. Subfloor preparation dictates whether your floor stays flat and secure over years of heavy use.
- Subfloor Prep: Ensure your concrete subfloor is completely clean, dry, and level. Any major dips, bumps, or debris beneath thick rubber tiles can cause uneven spots or tripping hazards. If installing over a basement concrete slab, check for moisture issues and lay down a proper vapor barrier if necessary.
- Installation Methods: For home interlocking tiles, a loose-lay method is standard—the sheer weight and friction of the heavy tiles keep them locked firmly in place without glue. For commercial settings using square-cut tiles, a full glue-down method using a specialized polyurethane adhesive ensures absolute stability under high foot traffic and heavy rolling loads (like sled pushes and utility carts).
- Precision Cutting: To fit tiles around room pillars, corners, or walls, use a sharp utility knife with a straight edge and a square. Score the rubber multiple times rather than trying to slice through a thick tile in a single cut for clean, professional-looking edges.
Long-Term Investment Value
Investing in premium heavy-duty rubber flooring is an investment in the longevity of your equipment, the safety of your joints, and the structural integrity of your facility. Cheap alternatives require constant replacement and put your space at risk of damage. By choosing the correct thickness, implementing a proper subfloor layout, and selecting high-density vulcanized rubber, you build a professional-grade training foundation that elevates both the performance and the aesthetic of your workout space for years to come.