
Stepping into a new home or apartment is an exciting milestone, but it often comes with a sudden wave of intimidation when the first minor maintenance issue pops up. Whether it is a loose cabinet door, a mysterious squeak, or a small hole left behind by a picture frame, the immediate instinct for many is to panic or call an expensive handyman. However, building a foundational toolkit and learning a few basic fixes is entirely achievable for anyone. Mastering these simple skills not only saves you hundreds of dollars in service fees and prevents minor issues from compounding into costly emergencies, but it also fosters a profound sense of self-reliance and pride in your living space.
1. The Ultimate Beginner’s Toolbox
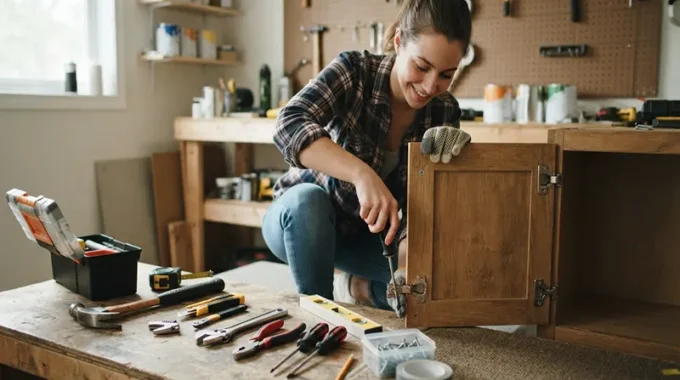
You do not need a massive, professional-grade workshop to handle everyday household maintenance. Having a compact, well-curated collection of reliable tools is more than enough to tackle 90% of minor repairs. Here is what you should look for when building your starter toolkit:
- The Claw Hammer (16-ounce): A standard weight for general tasks. The smooth face drives nails cleanly, while the curved claw is essential for pulling out bent nails or minor demolition work.
- Multi-Bit Screwdriver: Instead of a dozen individual screwdrivers, buy one high-quality handle that stores interchangeable flathead and Phillips bits inside. This saves space and covers almost every standard screw in a home.
- Heavy-Duty Tape Measure (16 to 25 feet): Look for a blade with a rigid standoff so it doesn’t bend immediately when you extend it across a room. A locking mechanism is a must.
- 9-Inch Magnetic Level: Ensuring pictures, shelves, and fixtures hang straight is crucial. A magnetic edge is especially handy if you are working near metal framing or appliances.
- Adjustable Wrench (8-inch): Often called a crescent wrench, this tool features an adjustable jaw that can fit nuts and bolts of various sizes, making it ideal for plumbing and furniture assembly.
- Slip-Joint Pliers: Great for gripping, bending, pulling, and holding objects firmly in place while you turn a fastener with your other hand.
- Cordless Drill/Driver: While you can use manual screwdrivers, a lightweight cordless drill speeds up assembly and makes driving screws effortless. Look for an 18V or 20V model with a variable speed trigger.
- Essential Safety Gear: Always keep a pair of wrap-around safety glasses to protect your eyes from flying debris and a pair of textured utility gloves to protect your hands from blisters, splinters, and sharp edges.
2. Easy DIY Fix 1: Banishing Squeaky Hinges and Loose Hardware
Loose cabinet pulls, wobbling drawer slides, and creaking doors are the most common household nuisances, yet they take less than two minutes to correct.
- Fixing Loose Hardware: Over time, the natural vibration of opening and closing doors strips the wood or composite material around screw holes. To fix a loose cabinet knob or hinge screw, remove the screw entirely. Dip a wooden toothpick or a small matchstick into a tiny bit of wood glue, snap it off flush inside the hole, and then re-insert the screw. The wood fibers give the screw something solid to bite into, securing it firmly.
- Silencing Squeaky Hinges: Avoid the temptation to grab a can of WD-40 for door hinges. While it provides a quick fix, WD-40 is a solvent and water displacer, not a long-term lubricant; it will dry out and attract dust, causing the squeak to return worse than before. Instead, use a drop of white lithium grease or machine oil. Open and close the door a few times to work the lubricant into the hinge pin, then wipe away any excess with a paper towel.
3. Easy DIY Fix 2: Patching Minor Wall Dings and Nail Holes
Moving furniture, hanging artwork, or accidental bumps inevitably leave small scars on your drywall. You do not need to paint an entire wall to fix a nail hole.
- Clean the Hole: Use your fingernail or the tip of a screwdriver to gently clear away any loose paper or crumbling drywall crusting around the edge of the hole. If there is a slight ridge sticking out, press it inward so the surface is flat.
- Apply Spackle: Scoop a small amount of lightweight vinyl spackle onto the edge of a flexible putty knife. Press the spackle firmly into the hole at a 45-degree angle, then scrape across the surface flat to remove excess material. It should look like a smooth, tiny dot.
- Sand and Paint: Allow the spackle to dry completely (usually 15 to 30 minutes for small holes; check your product label). Once dry and chalky white, take a fine-grit sanding block and gently buff the area until it is flush and smooth with the surrounding wall. Wipe away the dust with a damp cloth, and dab matching touch-up paint over the spot using a small foam brush.
4. Easy DIY Fix 3: Clearing a Slow-Running Sink Drain
A slow-draining bathroom sink is usually caused by an accumulation of hair, soap scum, and toothpaste residue trapped right near the top of the drain pipe. Before pouring harsh, toxic chemical drain cleaners down your pipes—which can damage older plumbing—try a physical clearing method.
- The Plastic Zip-Strip Snake: Purchase an inexpensive, flexible plastic drain snake with tiny barbs on the sides from any hardware store. Remove the sink stopper (usually by unscrewing it or releasing a pivot rod underneath), feed the plastic strip down the drain, and gently twist it as you pull it back up. You will be amazed at what comes out. Wipe the debris into a paper towel and run warm water to flush the line.
- Cleaning the P-Trap: If the blockage is slightly deeper, place a small bucket underneath the curved pipe beneath your sink (known as the P-trap) to catch trapped water. Use your adjustable wrench to loosen the slip nuts on both ends of the trap. Remove the pipe, empty the contents into the bucket, clean out any gunk with a brush and warm soapy water, and screw it back into place hand-tight (plus a quarter-turn with the wrench to seal it). Turn on the faucet to check for leaks.
Building Your DIY Confidence
Maintaining a home does not require an engineering degree; it requires patience, the right tools, and the willingness to try. By tackling these small maintenance tasks yourself, you build an intuitive understanding of how your living space works. Start small with a squeaky hinge or a single nail hole, celebrate your incremental wins, and watch how quickly your confidence grows. A well-maintained home is built one simple fix at a time.